Leveling Tone Holes with a Power Drill
By Curt Altarac
For years we have been working on saxophones at MusicMedic and leveling tone holes. This procedure in our professional overhaul has become a staple of what makes our work so good. However, the technique of filing tone holes is time consuming, and a new method had to be found to keep our shop profitable. Added to the issue of time are the tight tolerances we use avoid removing too much metal from the instrument. After trying several different techniques, and many different tools, we have now achieved a new level of success. That is, if you measure success based on the quality of the job produced, taking into account the time required to complete it. At our worst, we would spend as much as 6-8 hours at the bench leveling, de-burring and polishing the tone holes on saxophones. Now that job is reduced greatly and takes us less than ? the labor. Through this arduous experimentation and experience we have developed a technique for filing tone holes that not only saves time but is more accurate and safe than filing by hand.
A Bit of History: Filing tone holes is not an age old art. It is a fairly new practice that has come about because of the increase in quality and firmness of woodwind pads, and the development of skill and awareness of woodwind technicians. When our technicians first began to file tone holes, we were using a tone hole file similar to any file that one draws on metal to cut. This large flat file works fast but the cut is not often flat and, because of the files' size, it is difficult to reach every tone hole.. Further, the results obtained with a draw file are far from smooth and flat. We quickly switched to a round brass disc covered with sand paper to cut the tone holes down. This method was a little slower than the file but the results, due to the round cutter, were more consistent. Using different grits of sand paper, we were able to bring the tone hole to a nice polish removing even the smallest scratches in the tone hole surface. Shortly after using sand paper, I began to use the diamond grit Jim Schmidt tone hole files . The Diamond grit on these files is very useful for cutting brass. The time taken to level tone holes was greatly reduced and the jobs were more consistent. The resulting finish to the tone hole was not as nice as the sand paper but the the job was done in a shorter amount of time and the results were very good. To compensate, we would finish out our cutting by lapping the tone holes. To accomplish this, I cut a series of steel discs on the lathe and precision leveled them. Using the lapping compound in place of sand paper, we could get better results than sand paper. After experimenting to reduce the time and improve the job done by the Diamond tone hole files, we came up with our current method: Filing tone holes with a power drill. I believe that we now have a very useful procedure that is not only faster but produces a finer job with less burrs and an even tone hole surface.
Our new method is very easy to employ in your shop and the results are excellent. We have found that the drill method cuts fast on a non-level tone hole but it cuts very slow on a level tone hole. So, leveling a tone hole with a drill takes only about 20-60 seconds. However, cutting too much metal off the tone hole is very slow. Once the tone hole is level, cutting too much would take a long time. To test this, we leveled and cut a tone hole right down to the instrument body. Leveling the tone hole took about 1 minute, cutting it off completely required 15 minutes of constant drilling.
The Procedure:
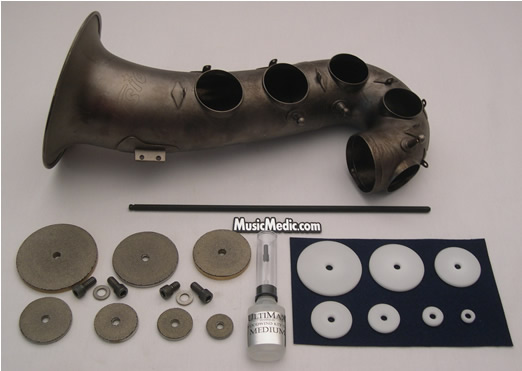
What you will need:
* Complete Tone Hole File Set
* A cordless drill with a low speed around 320 RPMs.
Our procedure of leveling tone holes using a drill is excellent in that it removes human error. The rotating file is held in the tone hole via a pilot and spun under power by a drill. If the technician does not touch the file itself and light pressure on the file is used, the resulting cut will be smooth and even.
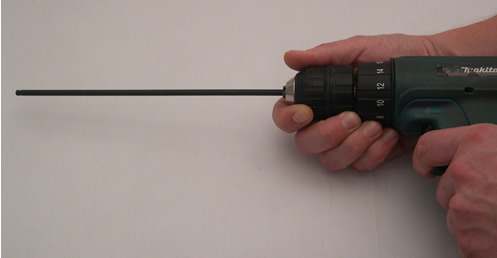
1. Insert the long file extension rod into your drill chuck making certain that the drill is set at about 320 RPMs. Set this drill aside.
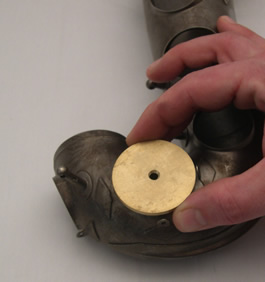
2. Choose a file disk that will fit on top of the tone hole without colliding with nearby posts or guards.
3. Choose the largest pilot that fits inside the tone hole.
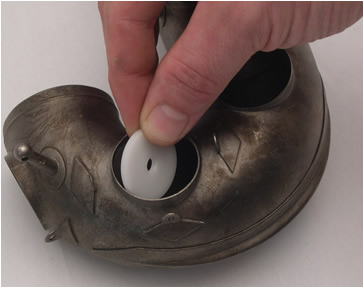
4. Screw the pilot onto the file. Shown here front and back:

5. Apply UltiMax Medium Viscosity Synthetic Oil to the file surface.
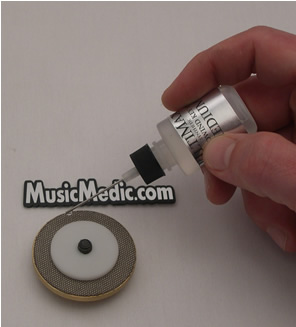
6. Place the pilot / file combination on and in the tone hole.
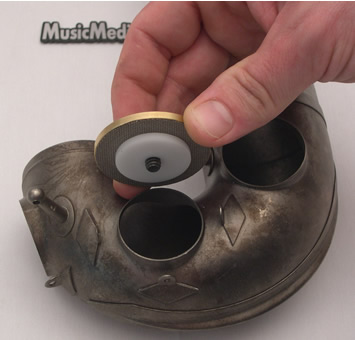
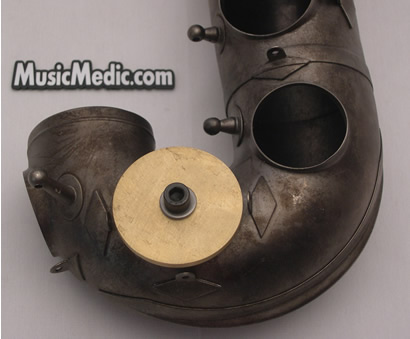
7. Hold the instrument with a cupped hand behind the tone hole that you are planning to file.
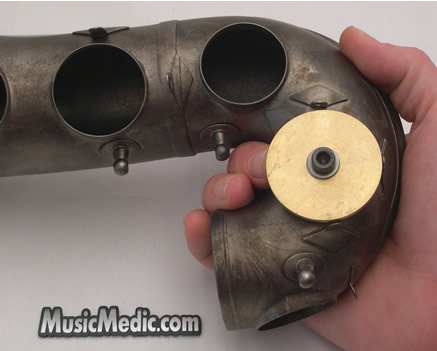
8. Place the rounded tip of the file extension rod into the Allen bolt on the file.
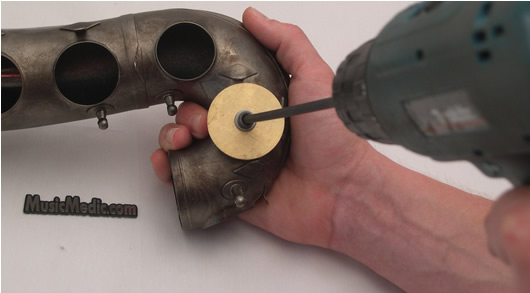
9. Start the drill and cut the tone hole for about 5 seconds.
10. Remove the file and check the tone hole. Note where the tone hole is getting cut and where it is not. Then flip the file over and put a leak light into the instrument. Using the flat side of the diamond file, you should be able to see your progress.
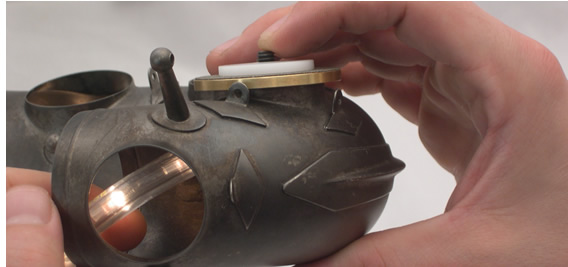
11. Continue to cut the tone hole with the drill and check until no light can be seen with the leak light.
12. As you become more accustomed to this process, you will not need to check your work as often while cutting. You will also see that leveling a tone hole happens very fast but cutting it down after it is level is a time consuming process. This is a good thing!
The procedure I've outlined may seem extreme to many technicians. You may think this method is too fast with a great likelihood of damaging the instrument. Consider that MusicMedic.com is a high end, specialized saxophone repair shop that caters to the needs of professional players around the world. The level of our work is very high and the players who choose our shop demand perfection. Don't be scared by the idea of using a drill. When you try our technique you will find it to be less damaging and more precise than the method you currently use. If this is not the case, please contact me and let me know the method you are using!
Copyright © 2000-2012
MusicMedic.com
All Rights Reserved