Installing MusicMedic.com Clarinet Tenon Cork
By Curt Altarac
Tools and supplies that you will need:
NOTE: All of these tools and supplies are available in the MusicMedic Repair Kits.

1. Remove existing cork, gently cleaning the surface that the old cork was on. Be careful not to damage the Tenon of your Clarinet. An old dull screw driver may come in handy here.
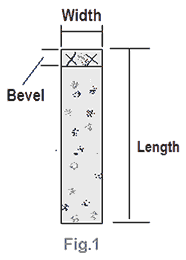
2. Using a straight edge and a razor knife, trim the new cork so it is the same width as your tenon. Do not try to adjust the thickness of the cork here. You will be able to adjust the thickness of the cork after it is in place. (see Figure 1) as the cork you are replacing.
3. Practice wrapping the cork around the tenon of your Clarinet. Practice this procedure without using glue. Notice how the bevel works and why it is beveled. This will be great practice for you before the potentially messy glue is involved.
NOTE: If you feel as though the cork might snap during the wrapping of your tenon, try this: Lay the cork on a flat solid surface and tap the cork many times with a hammer. By hitting the cork you are in effect tenderizing it. It will bend more freely after this procedure. When you feel comfortable putting the cork on the tenon, proceed.

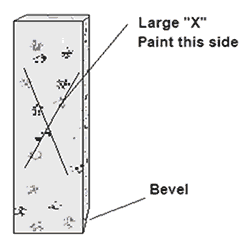
4. Paint a thin coat of contact cement on the un-beveled side of the cork (marked with a large X see figure above) Hold cork in hand and paint only the bevel on the opposite side (marked with two smaller X's). All surfaces marked with X's on the cork should be covered with contact cement. Careful not to let the cement touch any surface other than those intended. Put the tenon cork aside to dry.
5. Now paint the portion of the tenon that will be covered by the tenon cork and put it aside to dry.
6. Now Wait! Don't be impatient here. Let the contact cement dry almost completely on BOTH SURFACES about 5-10 minutes before you go any further.
Wrapping the Tenon Cork

Hint: Know that once the two pieces that are painted go together, there is no going back. They will instantly form a permanent bond... so be careful.
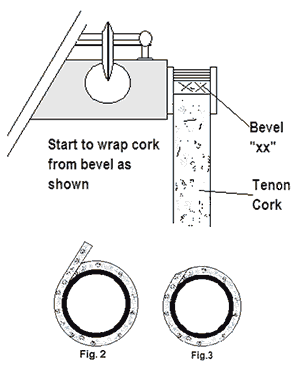
7. Now that the cement is dry, you are ready to start wrapping the cork around the tenon. The part of the cork that is completely painted (with the big X) will meet with the cement on the tenon. Starting with the backside of the bevel (the area with 2 small X's) carefully wrap the tenon going back around to the bevel and covering it. (See Figure 2) You should have done several dry runs of this step.
8. Gently trim off excess cork and save for another job such as key work. When you are done with this step, your cork should look like Figure 3. The glue on the excess cork will not hurt it, just glue that same side next time you use it.
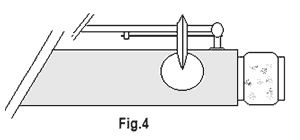
9. Now cut an appropriate size piece if sand paper and sand the joint so it is smooth. You will need to get someone to hold the clarinet for you. Use a strip of sand paper with a back and forth motion similar to that of a Shoe Shiner's cloth. Sand a little more cork off the edges than the middle. This will give the cork a rounded look. (See Figure 4)

10. When this is done try putting the two parts of your clarinet together gently. If you think it will fit, but is snug, put cork grease on the new cork and work it in with your thumb and first finger. Continue to grease the cork often and allow it to settle in.
11. If the cork is surely too thick, sand it down more. Be careful not to take off too much. Sand evenly around the tenon cork and check if your pieces fit often. This is more important the closer you come to completion.
12. When you think the pieces will fit snugly, work some cork grease into the cork. Put your Clarinet together. Apply cork grease often. You're all set!
Copyright © 2000-2012
MusicMedic.com
All Rights Reserved